

Preparing Your Listed Property For Summer Restoration Works
Planning summer restoration work on a listed building? Discover how to prepare the property, protect original plasterwork and ensure your project runs smoothly.
Summer is one of the most popular times of year for property restoration projects. Longer daylight hours and more predictable working conditions make it an ideal season for repairing and preserving historic buildings.
If you own a listed property, however, preparation is just as important as the restoration work itself. From obtaining the necessary permissions to protecting original architectural features, careful planning can help listed building restoration run more smoothly.
Start planning well before work begins
Restoration projects on listed buildings often involve more preparation than standard home improvements. Unlike modern properties, listed buildings are protected because of their historic or architectural significance.
This means that certain works may require Listed Building Consent, particularly if they involve altering original features or replacing historic materials.
It's worth speaking to your local planning authority or conservation officer as early as possible if you're unsure whether permission is required. Allowing plenty of time for discussions and approvals can help prevent unnecessary delays once summer arrives.
Similarly, if your project involves architects, surveyors or specialist craftspeople, booking them well in advance is advisable, as demand for conservation work often increases during the warmer months.
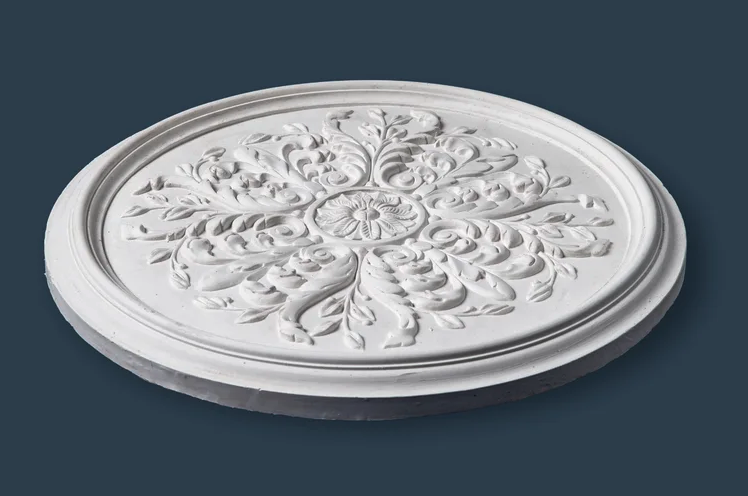
Assess the condition of decorative plasterwork
Before restoration begins, take the opportunity to inspect your property's decorative plaster features.
Look carefully at:
Cornices
Ceiling roses
Corbels
Wall mouldings
Decorative ceiling panels
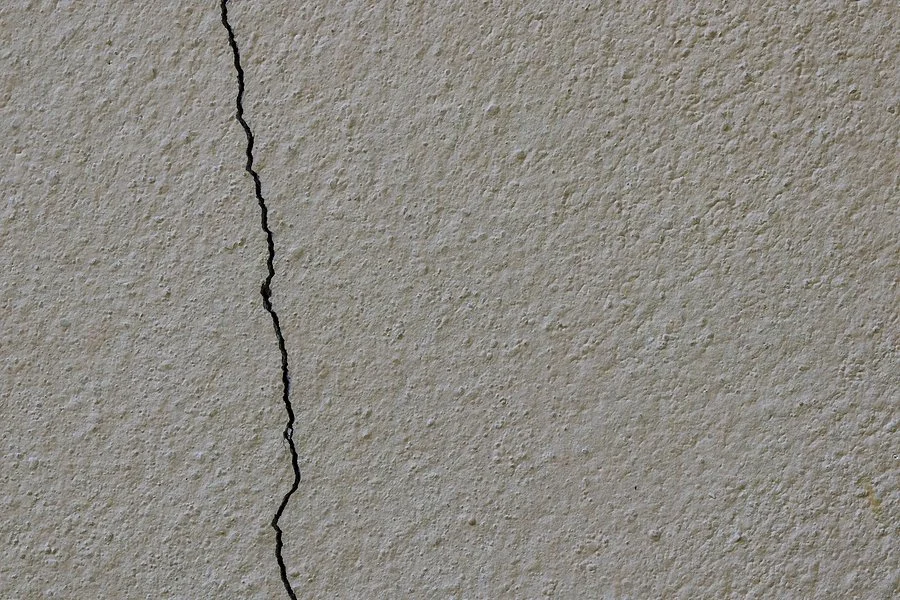
You're not necessarily looking for major defects. Even relatively minor issues can become more significant if left untreated.
Signs that may require professional attention include:
Hairline cracks
Loose plaster
Missing decorative sections
Water staining
Bulging or sagging areas
Previous repairs that are beginning to fail
A specialist restoration survey can help identify whether damage is purely cosmetic or whether more extensive repairs are needed.
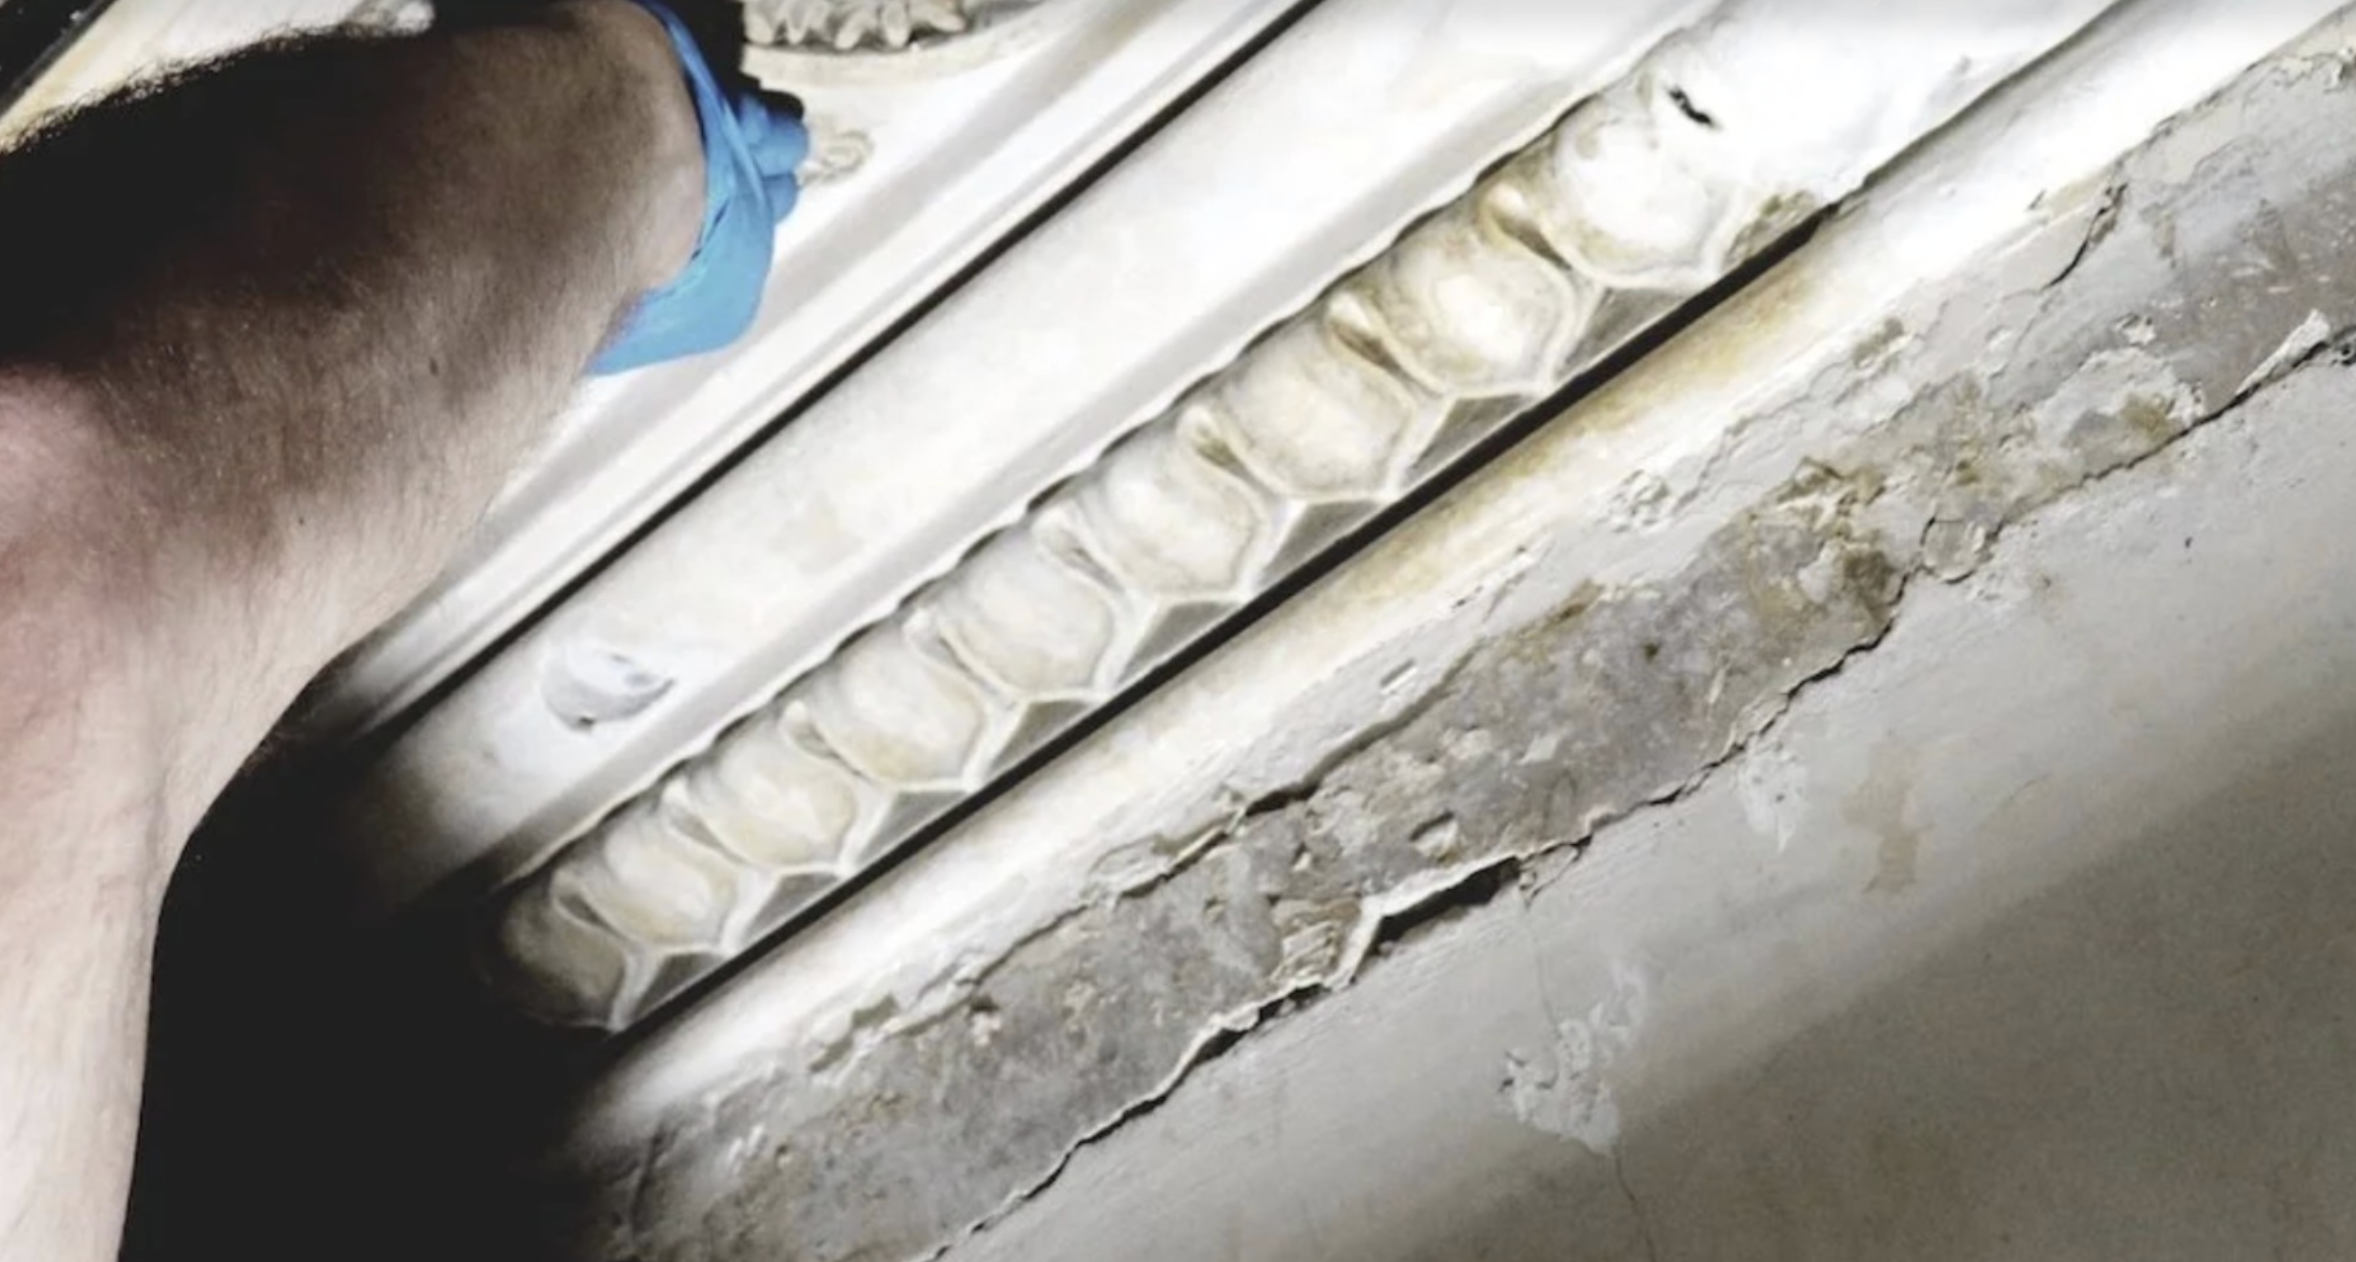
Check for water ingress before summer heat
Although summer is generally associated with dry weather, many plaster problems actually begin during wetter months.
Leaks from roofs, blocked gutters or damaged flashing may have occurred over winter without being immediately obvious. By the time warmer weather arrives, staining or cracking may start to appear as weakened plaster dries out.
Before beginning decorative restoration, it's important to ensure any sources of moisture have been addressed. Repairing beautiful plasterwork without solving the underlying cause of damp is unlikely to provide a lasting solution.
Protect original features during building works
Listed buildings often contain far more original fabric than homeowners initially realise.
In addition to decorative plasterwork, there may be:
Historic fireplaces
Timber panelling
Original joinery
Stone flooring
Decorative staircases
Antique glazing
If wider renovation work is taking place alongside plaster restoration, these features should be carefully protected throughout the project.
Dust sheets, temporary coverings and clearly defined working areas can all help minimise accidental damage while allowing specialist contractors to work safely.
Ensure good ventilation
Traditional buildings behave differently from modern homes. Historic properties were generally built using breathable materials that naturally regulate moisture movement.
Maintaining good ventilation during restoration helps support this process, particularly when repairs involve traditional lime-based plasters or other heritage materials.
Opening windows where appropriate and allowing natural airflow can assist drying without forcing moisture to evaporate too quickly. Specialist contractors will usually recommend the most suitable drying conditions depending on the materials being used.
Think carefully about modern improvements
Summer renovations often involve upgrading lighting, heating or electrical systems. While these improvements can make a listed property more comfortable, they should always be planned sympathetically.
For example, installing new lighting around decorative ceiling roses should be done without damaging original plasterwork. Likewise, new wiring routes should avoid unnecessary disturbance to historic architectural features wherever possible.
Plan for access
Many decorative plaster features are located in rooms with particularly high ceilings.
Before work begins, consider practical issues such as:
Scaffold access
Furniture removal
Protection of flooring
Parking for contractors
Safe storage of materials
Preparing the property in advance helps minimise disruption and allows restoration work to progress more efficiently.
Understand that restoration takes time
Unlike many modern building products, traditional plaster restoration cannot usually be rushed. Detailed decorative work often involves careful cleaning, stabilisation, mould-making and hand-finishing.
Allowing adequate time for each stage helps achieve a high-quality result while protecting the integrity of the original craftsmanship.
A successful summer restoration starts with good preparation
Summer provides excellent conditions for restoring historic buildings, but careful preparation is the key to achieving the best results.
By planning ahead, addressing underlying issues such as water ingress, protecting original features and working with experienced conservation specialists, you can help ensure your listed property receives the care it deserves.
How To Blend Contemporary Lighting With Traditional Ceiling Roses
Discover how to pair modern lighting with traditional ceiling roses. Learn useful design tips for period homes, restoration projects and contemporary interiors.
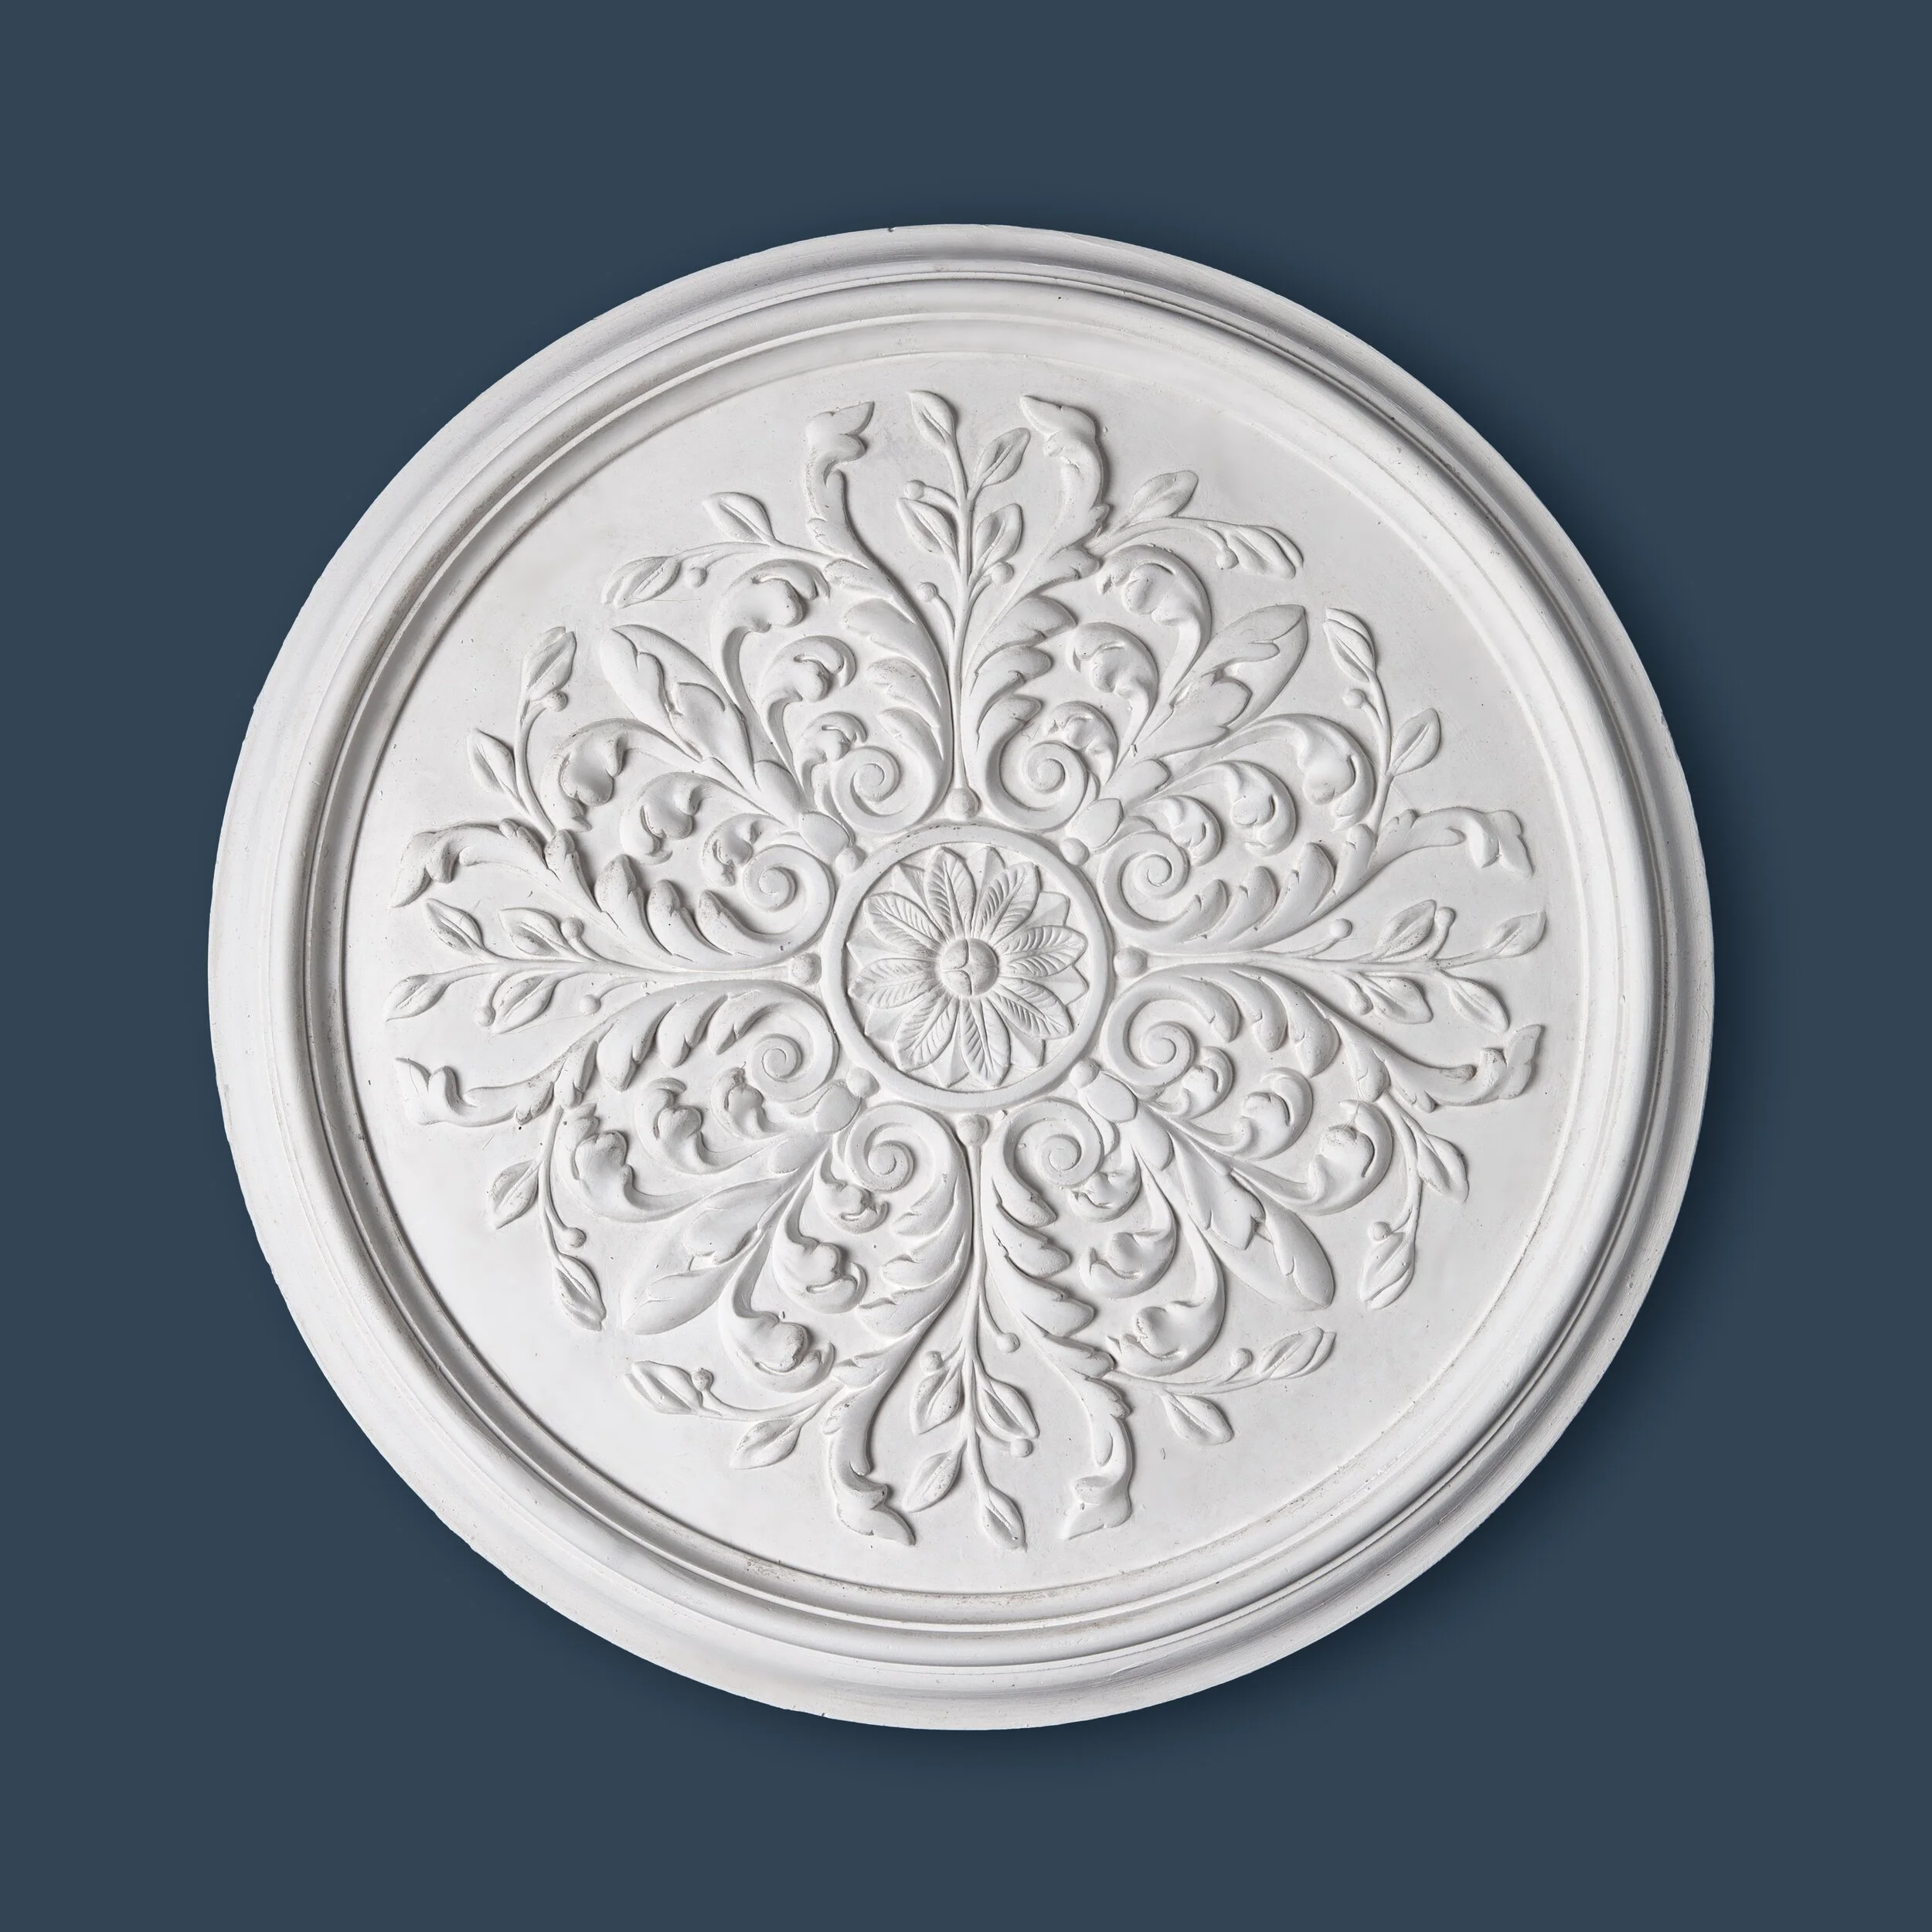
Traditional ceiling roses are among the most elegant architectural features found in period properties.
From understated Georgian designs to the elaborate floral patterns popular during the Victorian and Edwardian eras, these decorative plaster details were originally created to frame chandeliers and other statement light fittings.
Today, homeowners are increasingly combining original plaster ceiling roses with sleek pendants, minimalist lighting and contemporary interiors. The result can be a beautiful balance of old and new… but only if it's done thoughtfully.
Whether you're renovating a period home or introducing character into a modern property, here's how to successfully blend contemporary lighting with traditional ceiling roses.
Why ceiling roses still work in modern interiors
Although they have a long history, ceiling roses remain incredibly versatile. Rather than looking dated, well-maintained plaster ceiling roses can become a striking architectural feature that contrasts beautifully with modern décor.
Their intricate craftsmanship adds texture and depth to otherwise simple spaces, helping to create interiors that feel both elegant and individual.
Many interior designers intentionally mix historic features with contemporary furniture and lighting to avoid rooms feeling overly traditional or overly minimalist.
A decorative ceiling rose can act as the perfect focal point, drawing the eye upwards while framing a carefully chosen light fitting.
Respect the character of the property
Before choosing a new light fitting, consider the age and architectural style of your property. If you're fortunate enough to own a Georgian, Victorian or Edwardian home, the ceiling rose was likely designed specifically for the proportions of the room.
Preserving this feature helps retain the building's original character, even if the lighting itself is thoroughly modern. For listed buildings or heritage properties, retaining original plasterwork is often preferable to replacing it.
If the ceiling rose has suffered damage over the years, specialist restoration can usually repair cracks, recreate missing details and strengthen the feature without compromising its historic integrity.
Choose the right size light fitting
One of the most common design mistakes is selecting a light fitting that's either too small or too large for the ceiling rose.
A pendant that disappears within an elaborate rose can make the decorative plasterwork feel oversized, while an oversized fitting may obscure the intricate detailing altogether.
As a general rule:
Allow the ceiling rose to remain clearly visible around the light fitting
Choose proportions that suit the size of the room
Consider ceiling height, particularly in period properties with generous proportions
A well-balanced combination allows both the lighting and the plasterwork to complement each other rather than compete for attention.
Keep the colour palette simple
Contemporary lighting often works best when its finish contrasts subtly with traditional plasterwork.
Popular combinations include:
Matte black pendants with white plaster roses
Brushed brass fittings for a timeless look
Satin nickel for understated elegance
Soft bronze finishes in heritage interiors
Because most traditional ceiling roses are finished in white or off-white, they provide a neutral backdrop that works with almost any lighting finish.
Avoid overly ornate light fittings if the ceiling rose itself is highly decorative, as too much detail can create visual clutter.
Let the ceiling rose take centre stage
In many cases, the ceiling rose should remain the star of the show. Minimalist lighting designs often provide the perfect contrast, allowing the craftsmanship of the plasterwork to stand out.
Simple globe pendants, clean-lined cylinders and elegant linear fittings can all create an attractive balance between historic architecture and contemporary design.
This ‘less is more’ approach is particularly effective in modernised period homes where original features are paired with uncluttered interiors.
Consider different rooms
Ceiling roses are no longer reserved solely for formal reception rooms.
They can enhance almost any space, including:
Dining rooms
A modern pendant suspended over a dining table creates a dramatic focal point while allowing the ceiling rose to frame the lighting beautifully.
Living rooms
Contemporary chandeliers or sculptural statement lights can complement original plasterwork without overwhelming it.
Bedrooms
Simple pendant lighting combined with a decorative ceiling rose introduces subtle elegance and character.
Hallways
Even compact entrance halls can benefit from a carefully restored ceiling rose paired with understated modern lighting.
Achieving a timeless look
Interior design trends come and go, but combining original architectural details with carefully chosen contemporary elements creates interiors that rarely date.
By preserving traditional plasterwork and pairing it with modern lighting, homeowners can celebrate the craftsmanship of the past while embracing today's design styles. The result is a home that feels layered, sophisticated and full of character.

What Is The Difference Between Cornice, Coving And Crown Moulding?
Discover the differences between cornice, coving and crown moulding. Learn which style suits your property and why the terminology matters in home restoration.
If you're renovating a period property or planning to add decorative plasterwork to your home, you've probably come across the terms cornice, coving and crown moulding. They are often used interchangeably, but they don't always mean exactly the same thing.
Understanding the differences can help you choose the right feature for your property, communicate more effectively with architects and restoration specialists, and ensure any new work is appropriate for the style and age of your building.
What is coving?
Coving is generally the simplest of the three decorative features. It is fitted where the wall meets the ceiling to create a smooth transition between the two surfaces.
Rather than forming a sharp 90-degree angle, coving introduces a gentle curve or uncomplicated profile that softens the appearance of the room.
Modern coving is often manufactured from lightweight materials such as polyurethane, duropolymer or polystyrene, although traditional plaster coving remains a popular choice for higher-end projects and period properties, especially in London.
Because of its clean appearance, coving is suitable for a wide range of interiors, including:
Contemporary homes
New-build properties
Minimalist interiors
Extensions and loft conversions
Rooms where a subtle decorative finish is preferred
Simple coving can also be found in many older homes where elaborate decorative mouldings were never originally installed.
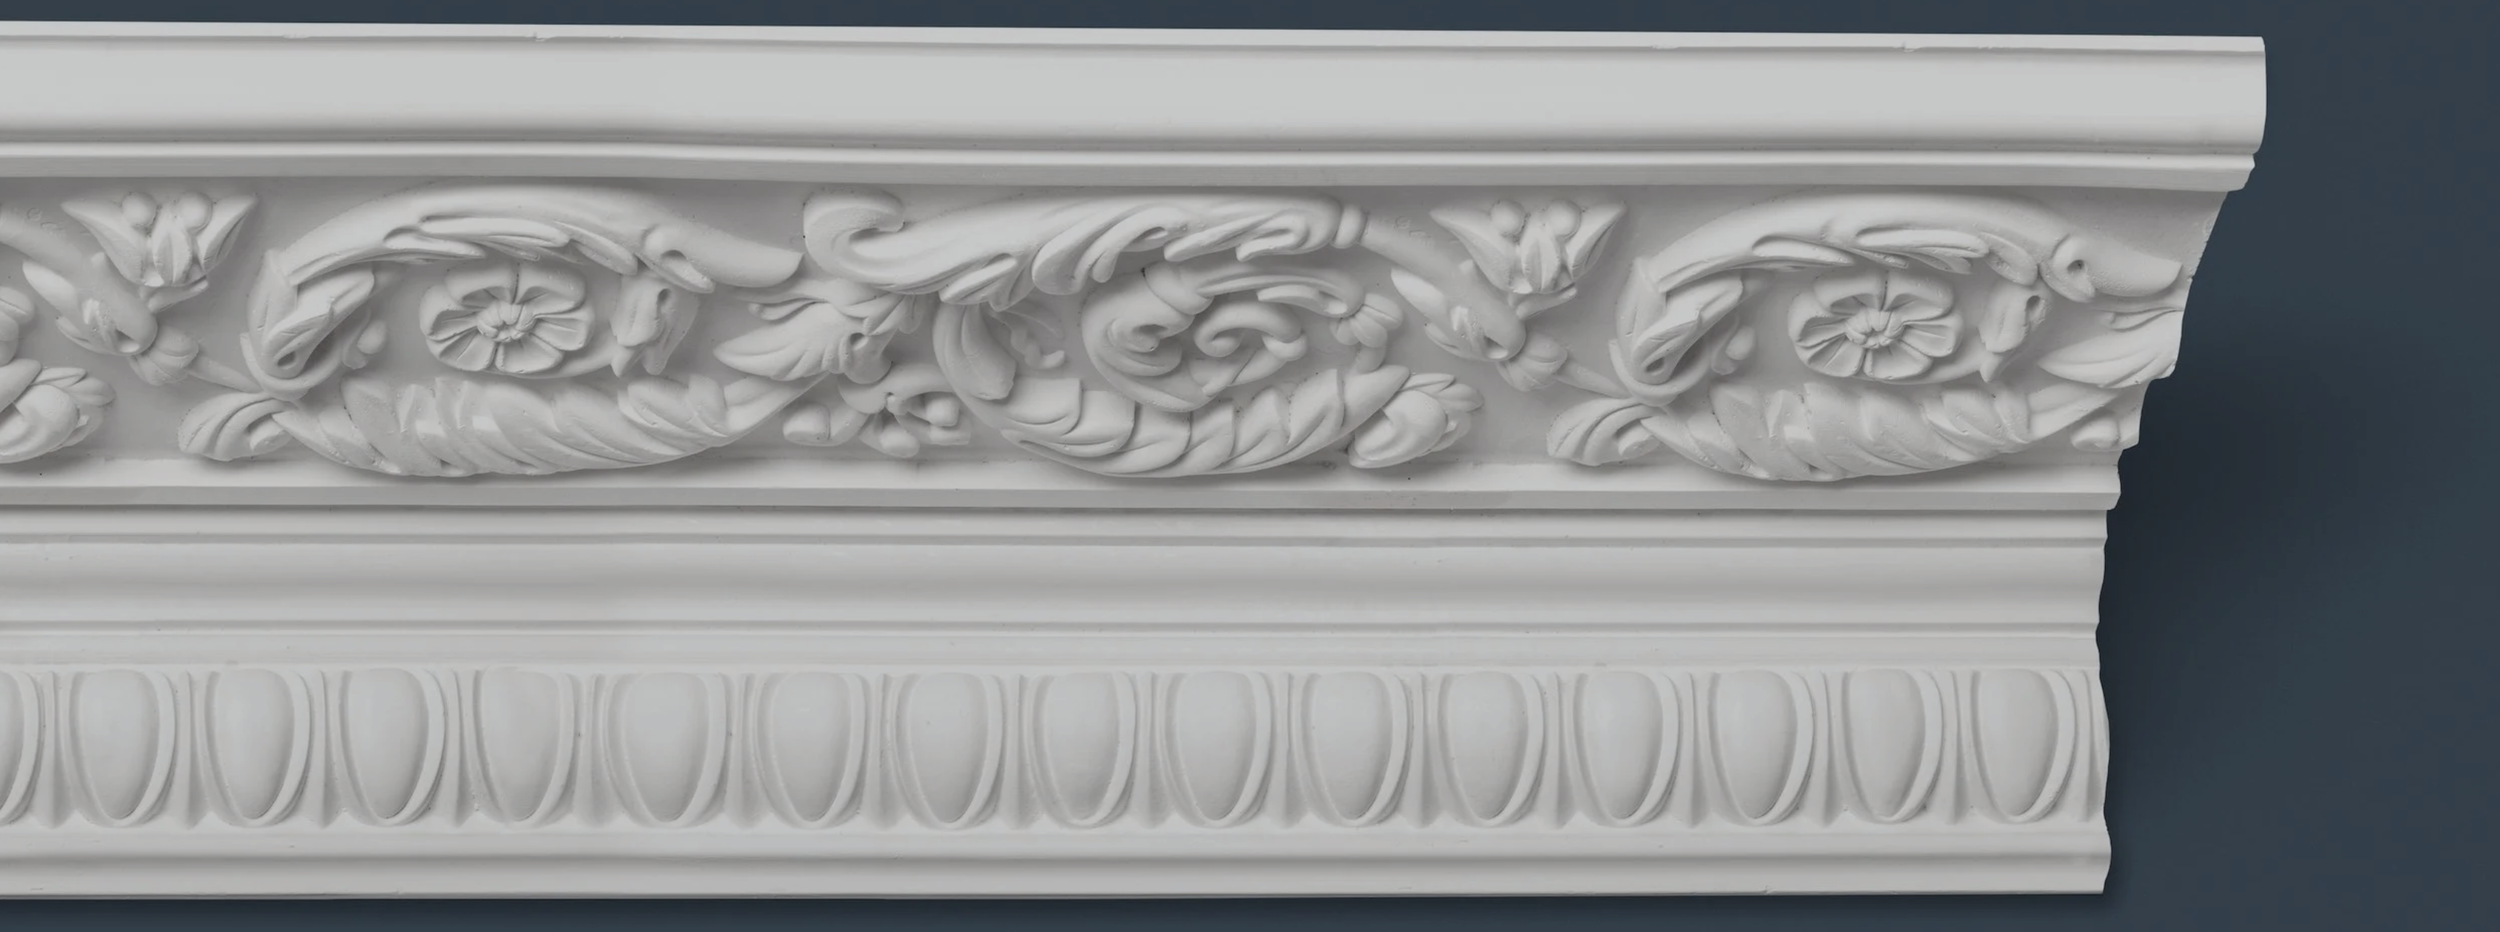
What is a cornice?
A cornice is typically more decorative and architecturally detailed than standard coving.
Like coving, it is installed at the junction between the wall and ceiling, but its profile usually incorporates ornamental features such as:
Dentils
Leaf motifs
Scrollwork
Floral designs
Classical mouldings
Historically, plaster cornices were handcrafted to complement the architectural style of a property. Georgian homes often feature elegant, restrained designs, while Victorian and Edwardian properties may display much more elaborate decorative work.
Original plaster cornices are commonly found in:
Townhouses
Country houses
Listed buildings
Historic public buildings
Churches
Grand entrance halls
Because these features form part of a building's architectural heritage, preserving them wherever possible is often the preferred approach during renovation projects.
What is crown moulding?
Crown moulding serves the same basic purpose as both coving and cornices: it bridges the gap between walls and ceilings, but the term is used primarily in North America.
In the United States and Canada, crown moulding is the general term for decorative mouldings installed at ceiling level, regardless of whether they are simple or highly ornate.
As a result, an American contractor might describe both plain coving and an elaborate plaster cornice as crown moulding.
Why the terminology matters
Although the differences may seem minor, using the correct terminology can be important when discussing restoration or renovation work.
For example, if you're restoring an original Victorian dining room with ornate decorative plasterwork, referring to the feature as a cornice more accurately reflects its historic and architectural significance.
Similarly, when sourcing replacement sections or commissioning bespoke mouldings, specialists will want to understand whether they're recreating a simple coving profile or an intricate period cornice.
Which is right for your property?
The best option depends largely on the age, style and character of your building.
Modern homes
Simple coving often complements clean architectural lines without overwhelming the room. It provides an elegant finish while maintaining a contemporary aesthetic.
Period properties
Historic homes generally benefit from cornices that reflect the property's original architectural style. Replacing ornate plaster cornices with plain modern coving can diminish the character of a room and reduce the authenticity of a restoration.
Heritage buildings
Listed and heritage properties frequently contain handcrafted plaster cornices that contribute significantly to their historic importance.
In these cases, specialist restoration allows damaged sections to be repaired or carefully reproduced while retaining as much original material as possible.
Can cornices be reproduced?
Yes; one of the advantages of traditional plaster restoration is that missing or damaged sections can often be recreated using surviving originals.
A plaster cornice specialist may:
Take casts from existing mouldings
Produce bespoke moulds
Hand-finish decorative details
Seamlessly integrate replacement sections with the original plasterwork
This allows even heavily damaged cornices to be sympathetically restored while maintaining the room's historic appearance.
Traditional plaster offers crisp detailing, durability and authenticity that can be difficult to achieve with lightweight alternatives. It is particularly well suited to period and heritage properties, where preserving architectural character is a priority.
For modern homes, high-quality plaster mouldings can also add timeless elegance and create a more substantial, premium finish.
Whether you're preserving original Georgian plasterwork or adding classic detail to a contemporary home, choosing the right moulding can make a significant difference to the finished result.
Can Hot Weather Affect Decorative Plaster Features?
Learn how hot weather can affect historic plaster cornices, ceiling roses and decorative mouldings, and discover how to protect period features from damage.
As the country swelters through scorching temperatures, many owners of period properties are beginning to ask if hot weather can affect historic plaster features.
While traditional plaster is an exceptionally durable material that can last for centuries when properly maintained, fluctuations in temperature and humidity can place stress on decorative plasterwork over time.
Understanding how hot weather affects them can help property owners identify problems early and take steps to preserve these important features.
Why historic plaster reacts to environmental changes
Traditional plaster is a natural material that responds to changes in its surroundings. Many decorative plaster features found in Georgian, Victorian and Edwardian properties were installed decades or even centuries ago.
During that time, they have naturally expanded, contracted and settled alongside the building itself. While plaster does not expand dramatically in hot weather, repeated cycles of heating and cooling can gradually contribute to stress.
This occurs both within the material and at the points where plasterwork meets walls and ceilings. It is particularly noticeable during periods of unusually high temperatures or when heatwaves are followed by rapid cooling.
Can heat cause cracks in cornices and ceiling roses?
Heat alone rarely causes major cracks to appear overnight. However, prolonged periods of hot weather can contribute to conditions that make cracking more likely.
Common factors include:
Expansion and contraction of surrounding building materials
Movement within timber structures
Existing weaknesses in ageing plaster
Changes in humidity levels
Previous repairs that have deteriorated over time
As structural materials respond differently to temperature changes, small stresses can develop at junctions between ceilings, walls and decorative mouldings. Over time, these stresses may manifest as hairline cracks or more noticeable fractures.
The impact of low humidity
One of the lesser-known effects of prolonged hot weather is reduced indoor humidity. Historic buildings were often designed to ‘breathe,’ allowing moisture to move naturally through traditional construction materials.
During particularly dry periods, timber beams, joists and other structural elements can lose moisture and shrink slightly. Even small movements can affect decorative plaster features attached to these structures.
Potential signs include:
Fine cracks along cornice lines
Small gaps between mouldings and walls
Minor movement around ceiling roses
Separation at decorative joints
While these changes are often subtle, they should not be ignored, particularly in older properties.
Roof spaces can become extremely hot
Many decorative plaster ceilings sit directly beneath roof spaces. During summer, loft temperatures can rise significantly higher than external air temperatures. In some cases, roof voids can become extremely hot for extended periods.
This can increase thermal movement within the building structure and accelerate the ageing of older repairs or fixings.
Historic plasterwork that has already been weakened by water damage, structural movement or poor previous repairs may be particularly vulnerable during these conditions.
Why existing damage often becomes more noticeable in summer
Many homeowners first notice plaster defects during periods of warm weather. This is not necessarily because the heat has created new damage. More commonly, existing weaknesses become more visible as the building responds to seasonal changes.
For example:
Hairline cracks may widen slightly
Loose sections can become more apparent
Existing repairs may begin to fail
Decorative details may show signs of separation
Summer therefore provides a useful opportunity to inspect historic plasterwork and identify areas that may benefit from professional attention.
How to protect historic plaster during hot weather
Fortunately, there are several practical steps property owners can take to minimise risk.
Maintain stable indoor conditions
Sudden fluctuations in temperature and humidity can place unnecessary stress on historic materials.
Where possible:
Avoid excessive indoor heat build-up
Use blinds or curtains during the hottest part of the day
Ensure adequate ventilation
Avoid dramatic temperature swings from cooling systems
Inspect roofs and gutters
Many plaster problems originate from moisture rather than heat itself.
Regular inspections can help identify:
Leaking roofs
Damaged flashing
Blocked gutters
Overflowing rainwater systems
Preventing water ingress remains one of the most effective ways to preserve decorative plasterwork.
Address small cracks early
Minor defects are often easier and more cost-effective to repair than extensive damage. If cracks begin to appear, obtaining advice from a plaster restoration specialist can help determine whether they are purely cosmetic or symptomatic of a larger issue.
Preserving historic features for future generations
Decorative plasterwork has survived for centuries in many historic properties because of the quality of its craftsmanship and materials.
By identifying problems early and preserving original features wherever possible, property owners can ensure these important architectural details continue to enhance period buildings for many years to come.
Do Listed Building Regulations Apply To Cornice Restoration?
Discover how listed building regulations affect cornice repair projects. Learn when consent may be required and why specialist plaster restoration is essential.
Owning a listed building comes with the privilege of preserving a piece of architectural history, but it also brings responsibilities when carrying out repairs, alterations, or restoration work.
One question frequently asked by property owners, architects and developers is whether listed building regulations apply to cornice repair or restoration.
The answer is usually yes. Decorative plaster cornices are often considered an important historic feature of a listed property, meaning that any work affecting them may be subject to regulations designed to protect the building's character.
Understanding what is permitted, what may require consent, and how specialist restoration can help preserve original features is essential before starting any project.
What is a listed building?
A listed building is a structure recognised for its special architectural or historic interest. In England, buildings are listed by the government and placed into one of three categories:
Grade I – Buildings of exceptional interest
Grade II* – Particularly important buildings of more than special interest
Grade II – Buildings of special interest
Many listed properties contain original decorative plasterwork, including cornices, ceiling roses, corbels, panel mouldings and ornate ceiling details. These features often contribute significantly to the building's historic character and are therefore protected as part of the listing.
Are cornices protected in listed buildings?
In most cases, yes. A common misconception is that only the exterior of a listed building is protected. In reality, listing often covers both internal and external features, including historic decorative plasterwork.
Original cornices may be regarded as an integral part of the building's architectural significance, particularly in Georgian, Victorian, Edwardian and earlier properties. Even relatively small alterations can potentially affect the building's historic value.
Because of this, removing, replacing or substantially altering decorative cornices may require Listed Building Consent.
Does cornice repair require listed building consent?
The answer depends on the nature of the work being carried out. Generally speaking, like-for-like repairs and sensitive restoration work are viewed differently from alterations or replacement.
For example:
Repairs that may not require consent
Filling minor cracks
Stabilising loose plaster
Reinstating small damaged areas using traditional methods
Cleaning and conserving original decorative features
Where the work is genuinely considered repair rather than alteration, formal consent may not always be required.
Work that may require consent
Removing original cornices
Replacing historic plasterwork with new designs
Altering the profile or decorative details
Installing features that significantly change the character of a room
Removing damaged sections and replacing them entirely
Every listed building is unique, and requirements can vary between local authorities. It is always advisable to consult your conservation officer or planning department before commencing work.
Why cornice preservation is usually preferred
Conservation principles generally favour retaining as much original material as possible. This is particularly important with decorative plasterwork, where original craftsmanship often reflects historical building techniques and design styles that may be difficult to replicate precisely.
A specialist plaster restoration company will typically follow a conservation-led approach:
Save what can be preserved
Repair rather than replace wherever practical
Match original materials and techniques
Reinstate missing sections only when necessary
This approach helps maintain the authenticity of the building while addressing structural or cosmetic issues.
Common causes of cornice damage in listed buildings
Many period properties experience deterioration in decorative plasterwork over time. Common causes include:
Water ingress
Leaks from roofs, gutters or plumbing can weaken plaster and cause cracking, staining or detachment.
Structural movement
Older buildings naturally move over time. Settlement can create fractures within decorative mouldings and ceiling junctions.
Previous unsympathetic repairs
Modern fillers, inappropriate materials or poorly executed repairs can sometimes cause further deterioration and complicate future restoration work.
Age-related wear
Decades or even centuries of environmental changes can gradually affect historic plasterwork.
Identifying the underlying cause of damage is often just as important as repairing the visible defects.
What happens if parts of a cornice are missing?
It is not uncommon for sections of decorative cornice to have been removed during previous renovations or damaged beyond repair. In these situations, skilled plaster specialists can often reproduce missing details using surviving sections as templates.
This process may involve:
Taking casts from original mouldings
Creating bespoke moulds
Reproducing decorative elements by hand
Seamlessly integrating new sections with existing plasterwork
The aim is to retain visual consistency while preserving as much historic fabric as possible.
Choosing the right restoration specialist
When working on a listed building, experience matters. A contractor familiar with historic plasterwork will understand traditional techniques, period styles and conservation principles.
They will also appreciate the importance of preserving original features wherever possible rather than recommending unnecessary replacement.
Whether restoring a simple cornice or undertaking a complete decorative plaster restoration scheme, specialist knowledge helps ensure that repairs remain sympathetic to the building's heritage.
Why Is My Ceiling Rose Cracking? Causes And Repair Tips
Learn the most common causes of ceiling rose cracks, how to identify serious issues, make repairs, and when professional plaster restoration may be needed.
A decorative ceiling rose is often one of the most striking features in a period property. Whether it's an ornate Victorian design or a simpler Edwardian moulding, a plaster ceiling rose can add character, elegance, and architectural interest to a room.
However, many homeowners eventually notice cracks appearing around their ceiling rose and wonder whether it's simply a cosmetic issue or a sign of something more serious.
Usually, there’s no cause for major concern: in many cases, ceiling roses can be successfully repaired and restored. The key is understanding what has caused the cracking in the first place.
What causes ceiling roses to crack?
There are several reasons why cracks may appear in decorative plasterwork. Some are relatively harmless, while others may require further investigation.
Natural movement in older buildings
One of the most common causes of cracking is natural building movement. All buildings move to some degree.
Seasonal temperature changes, settling foundations, and the expansion and contraction of building materials can create small stresses throughout a property. Because ceiling roses are fixed directly to the ceiling, these movements often show up as:
Fine hairline cracks
Small fractures around decorative details
Slight separation between the ceiling rose and ceiling surface
In period homes, particularly Victorian and Edwardian properties, this type of cracking is often considered normal ageing rather than a structural concern.
Age and material deterioration
Many original ceiling roses have been in place for well over a century.
Over time:
Plaster naturally becomes more brittle
Adhesives can weaken
Previous repairs may deteriorate
Multiple layers of paint can add weight and stress
As materials age, small cracks can develop even if there is no underlying structural issue. Older decorative plasterwork often benefits from periodic inspection and maintenance to prevent minor defects from worsening.
Water damage and damp
Moisture is one of the most damaging factors affecting decorative plaster. A leaking roof, plumbing issue, or persistent condensation can weaken the plaster and lead to cracking.
Signs that damp may be contributing include:
Brown or yellow staining
Flaking paint
Soft or crumbly plaster
Mould growth nearby
Sagging sections around the ceiling rose
If water damage is present, the source of the moisture must be addressed before any cosmetic repairs are undertaken. Otherwise, the cracks are likely to reappear.
Heavy light fittings
Many ceiling roses were originally designed to support relatively lightweight period light fittings. Modern chandeliers and large pendant lights can place additional strain on both the ceiling and the decorative plaster surrounding them.
Over time, excessive weight may cause:
Radial cracking around the centre
Separation from the ceiling surface
Distortion of decorative details
If a heavy fitting is suspected, a qualified electrician should assess whether it is properly supported by the building structure rather than relying on the ceiling rose itself.
Poor previous repairs
Not all repair work stands the test of time. It's common to find older ceiling roses that have been patched using inappropriate materials such as:
Modern fillers
Excessive caulking
Hard cement-based products
Incorrect adhesives
These materials often expand and contract differently from traditional plaster, causing cracks to return. A specialist restoration approach usually provides a more durable and visually sympathetic solution.
Could cracks in ceiling roses indicate structural problems?
Sometimes. Most ceiling rose cracks are caused by age, movement, or minor deterioration. However, certain warning signs should not be ignored.
Seek further investigation if you notice:
Large or widening cracks
Significant ceiling sagging
Cracks spreading across walls and ceilings
Doors or windows sticking
Sudden changes in crack size
These symptoms may indicate structural movement that requires professional assessment before restoration work begins.
How to fix a cracked ceiling rose
The correct repair method depends on the cause and extent of the damage.
Minor hairline cracks
For small cosmetic cracks:
The area can be cleaned carefully
Loose material removed
Fine cracks filled using appropriate plaster repair materials
The surface prepared and repainted
When carried out correctly, these repairs can become virtually invisible.
Larger cracks and missing sections
More significant damage may require:
Stabilisation of the existing plaster
Recreation of missing decorative details
Specialist casting techniques
Localised restoration work
A skilled plaster restoration specialist can often recreate damaged sections to match the original design exactly.
Severe damage
Where a ceiling rose has become unstable or extensively damaged, partial or full replacement may be necessary. However, replacement should usually be considered a last resort.
When should you contact a plaster restoration specialist?
Professional advice is recommended if:
Cracks continue to worsen
Pieces of plaster are becoming loose
Decorative details are missing
Water damage is evident
You want to preserve original historic features
An experienced plaster restoration specialist can assess the cause, recommend appropriate repairs, and help retain as much original material as possible.

How To Collaborate With Plaster Specialists On Heritage Projects
Learn how architects, contractors, designers, and property owners can successfully collaborate with plaster restoration experts to preserve historic features.
Heritage buildings present unique challenges that modern construction projects simply do not face. Original plasterwork, decorative mouldings, cornices, and ceiling roses often form an important part of a property's historical significance and architectural character.
Preserving these elements requires specialist knowledge, careful planning, and close collaboration between all parties involved.
Whether you're an architect, interior designer, contractor, conservation professional, or property owner, working effectively with plaster specialists can make the difference between a successful restoration and a project that compromises the building's authenticity.
Here are some key ways to ensure a productive collaboration on heritage plaster restoration projects.
Involve plaster specialists early in the project
One of the most common mistakes on heritage projects is bringing in plaster specialists too late. Decorative plasterwork is often treated as a finishing detail when, in reality, it can significantly influence project planning, timelines, and budgets.
Early involvement allows specialists to assess the condition of existing features before other works begin.
This early assessment can help identify:
Original features that can be restored
Areas requiring replication or reinstatement
Structural issues affecting plasterwork
Potential access challenges
Conservation requirements
By consulting specialists during the planning phase, project teams can avoid costly surprises later in the process.
Understand the importance of preservation
The goal of heritage restoration is not necessarily to make everything look brand new. In many cases, preserving original material is considered more valuable than replacing it.
Experienced plaster restoration specialists typically follow a philosophy of saving what can be saved and reinstating only what has been lost beyond repair.
This approach helps retain:
Historic craftsmanship
Original architectural details
Heritage value
Authenticity of the building
Project teams should understand that restoration work may involve careful repairs and stabilisation rather than wholesale replacement.
Share historical information and documentation
The more information a plaster specialist has, the better the outcome is likely to be.
Useful documentation may include:
Historic photographs
Architectural drawings
Conservation reports
Previous renovation records
In some cases, old photographs reveal details that have been removed or damaged over time, allowing specialists to recreate missing features accurately. Even seemingly minor information can prove invaluable when restoring decorative plasterwork.
Allow time for investigation
Heritage buildings often contain hidden surprises. Layers of paint, previous repairs, suspended ceilings, or modern alterations can conceal original decorative features. Before restoration begins, plaster specialists may need time to investigate the building thoroughly.
This process can involve:
Carefully exposing concealed features
Taking moulds from surviving sections
Assessing previous repairs
Identifying original materials and techniques
Rushing this stage can result in inaccurate restoration work or missed opportunities to preserve original details.
Coordinate with other trades
Plaster restoration rarely happens in isolation.
Heritage projects often involve multiple specialists working within the same spaces, including:
Architects
Builders
Electricians
Joiners
Decorators
Conservation consultants
Structural engineers
Close communication between trades is essential. For example, electrical installations should generally be completed before decorative plaster features are reinstated. Similarly, structural repairs may need to be finished before delicate restoration work begins.
Be realistic about timescales
Unlike modern building products that can be ordered and installed quickly, heritage plaster restoration is often a highly skilled and time-intensive process.
Tasks may include:
Hand-making moulds
Casting bespoke components
Repairing intricate decorative details
Matching historic designs
Allowing materials to cure properly
Because much of the work is bespoke, timelines can be longer than clients initially expect. Building realistic schedules into the project from the outset helps avoid unnecessary pressure and ensures quality is not compromised.
Respect traditional materials and methods
Many heritage properties were constructed using materials and techniques that differ significantly from modern building practices.
Traditional lime plasters, for example, behave differently from modern gypsum-based products. Using inappropriate materials can sometimes cause long-term damage.
Experienced plaster specialists understand how traditional materials perform and can advise on suitable repair methods.
Successful collaboration means allowing specialists to recommend solutions that prioritise the long-term health of the building rather than short-term convenience.
Discuss replication and reinstatement carefully
On some projects, decorative plasterwork may be missing entirely or damaged beyond repair. In these situations, plaster specialists can often create accurate replicas using surviving fragments, photographs, or historical references.
Before replication begins, it is important to discuss:
Which features should be restored
Which features should be replicated
How much original material remains
Conservation requirements
Desired level of authenticity
Clear expectations help ensure everyone is working towards the same outcome.
When it comes to historic plasterwork, careful collaboration doesn't just protect decorative details; it helps preserve the story of the building itself.
How To Clean And Maintain Decorative Plasterwork Properly
Learn how to clean and maintain decorative plasterwork safely. Discover expert tips for caring for cornices, ceiling roses, and other period plaster featu
Decorative plasterwork is one of the defining features of a character property. From ornate cornices and ceiling roses to detailed panel mouldings and corbels, these architectural details add depth, elegance, and craftsmanship that modern interiors often lack.
But like any original feature, plasterwork needs proper care to stay looking its best. Dirt, moisture, poor repairs, and even overpainting can gradually reduce the sharpness and beauty of decorative details over time.
However, with the right maintenance, decorative plasterwork can last for generations. Here’s how to clean and care for it properly without causing damage.
Why decorative plasterwork needs special care
Unlike standard painted walls, decorative plaster features are often more delicate and detailed. Many older mouldings were handmade using traditional materials, making them more vulnerable to harsh cleaning methods or inappropriate repairs.
Common issues include:
Dust build-up in intricate detailing
Hairline cracks from natural movement
Water staining or damp damage
Paint obscuring fine details
Chips or surface deterioration over time
Regular maintenance helps prevent minor issues becoming major restoration projects later on.
Start with gentle dusting
Dust is the most common issue affecting decorative plasterwork, especially on ceiling-level features like cornice and ceiling roses. Because plaster mouldings contain grooves and fine detail, dust can collect gradually and dull the appearance of the design.
Best methods for dust removal:
Soft microfibre cloths
Feather dusters
Soft-bristled paintbrushes
Vacuum cleaners with brush attachments (used carefully)
Work gently and avoid pressing too hard, particularly on older or fragile sections. For high ceilings, use extendable tools rather than ladders wherever possible to reduce the risk of accidental damage.
Avoid excess water
One of the biggest mistakes people make when cleaning plasterwork is using too much moisture. Traditional plaster is porous, meaning it can absorb water easily.
Excess moisture may lead to:
Softening of the plaster
Surface deterioration
Staining
Cracking over time
If deeper cleaning is needed, use only a lightly damp cloth, not a soaking wet sponge, and dry the area immediately afterwards. As a rule, decorative plasterwork should never be saturated with water.
Be careful with cleaning products
Harsh chemical cleaners can damage plaster surfaces and paint finishes.
Avoid:
Bleach-based products
Abrasive cleaners
Scouring pads
Strong solvents
These can strip paint, weaken plaster, or erode delicate detailing. For most situations, warm water with a very mild soap solution is more than enough. Always test a small, hidden area first before cleaning larger sections.
Watch for cracks and early signs of damage
Small cracks in plasterwork are common, especially in older properties. Buildings naturally expand and contract over time, and decorative mouldings often show these movements first.
While fine hairline cracks are usually not serious, it’s important to monitor:
Widening gaps
Loose sections
Crumbling plaster
Repeated cracking after repairs
Spotting issues early can prevent larger restoration work later. If sections feel unstable or pieces begin separating from the wall or ceiling, it’s best to contact a plaster restoration specialist rather than attempting DIY repairs.
Keep damp under control
Moisture is one of the leading causes of decorative plaster damage. Leaks, condensation, and poor ventilation can all affect plaster mouldings over time.
Water damage may cause:
Discolouration
Flaking paint
Soft or weakened plaster
Mould growth
Cornice separating from walls
To protect plasterwork:
Fix roof or plumbing leaks quickly
Improve ventilation in kitchens and bathrooms
Reduce condensation where possible
Maintain gutters and external drainage
Addressing damp early is essential if you want to preserve original features.
Avoid overpainting decorative features
Over decades, decorative plasterwork can accumulate many layers of paint. While repainting is often necessary, excessive layers can soften and obscure the sharp detail that makes period plasterwork attractive in the first place.
Good practice includes:
Using thinner coats of paint
Avoiding heavy gloss finishes that clog detailing
Preparing surfaces properly before repainting
In some cases, professional paint removal may help restore definition to heavily coated features.
Use the right paints
Breathable paints are often the best option for traditional plaster, especially in older homes. Modern non-breathable paints can sometimes trap moisture, contributing to cracking or peeling over time.
Matt finishes are generally preferred for decorative plasterwork because they:
Highlight detail more naturally
Create a softer, more authentic appearance
Avoid excessive glare on ornate surfaces
The aim should be to enhance the craftsmanship, not overpower it.
Decorative plasterwork is designed to last, but it performs best when properly cared for. Gentle cleaning, careful maintenance, and early attention to problems all help preserve the detail and craftsmanship that make period interiors so distinctive.